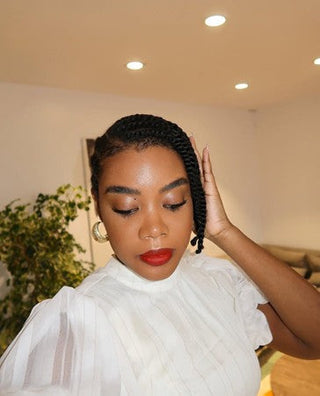

Flat twists are one of the most chic and elegant protective styles for natural hair. However, they can be a little tricky to do if you’re a beginner. This beautiful hairstyle is a cross between two-strand twists and cornrows, so getting a flawless look requires a few tips and tricks. The good news is, we’re here to save you all the confusion and stress. In this article, we’ll be detailing a step-by-step guide on how to create the perfect flat twists on your natural hair. Keep reading to discover our most important tip.
What Is The Difference Between Flat Twists And Two Strand Twists?
The major difference between flat twists and two-strand twists is that flat twists lie flat on the scalp like cornrows, while two-strand twists remain as individual strands of twisted hair. Two-strand twists require the two separate strands of hair to be twisted in a rope-like fashion, while flat twists are twisted flat across the scalp in a plait to form a rope-like braid.
4 Benefits Of Flat Twists For Natural Hair
Low Manipulation
Flat twists are one of the few long-lasting protective styles that are truly low manipulation. Since they are made by creating rope-like plaits, they do not put too much tension on the scalp and do not require the hair to be excessively pulled and tugged at.
Helps With Length Retention
Flat twists keep your curls tucked in and protected from friction and other environmental aggressors that could cause breakage. So they help you retain length by minimising breakage, so you can notice significant hair growth over time.
Easy And Low Maintenance
If you want a truly low maintenance hairstyle that let's you forget about styling your hair for a week or two, flat twists are one of the best hairstyles you can go for. They are also fairly easy to do compared to other styles like cornrows and braids.
Boosts Moisture Retention
Flat twists keep your hair from being completely exposed to environmental aggressors that can cause your hair to lose moisture, but they are loose enough for your hair to allow your strands to easily absorb moisture when you apply something like our Manuka Honey Leave-in Conditioner or Curl Refresh. So they are amazing for keeping moisture in your hair at all times.

Is It Better To Flat Twist On Wet Or Dry Hair?
Flat twists are better when done on dry hair because you get a smoother finish. Wet frizz is a very common thing with flat twists, and your hair can easily end up frizzy and shrunken. However, the best way to flat twist your hair is when it is damp and coated with moisturising products like our Manuka Honey Leave-in Conditioner our Twist & Braid Gel. This will ensure to get a sleek and shiny finish and make your hair more manageable.
How Long Do Flat Twists Last?
Flat twists can last between 1-2 weeks, depending on how well you maintain them. If you want them to last long, protect your hair with a satin bonnet or scarf before going to bed and hydrate your twists with our Everyday Curl Refresh 1-2 times a week.

How To Flat Twist Natural Hair: Step-by-Step Guide
1. Start On Freshly Washed Hair
Clean hair is the foundation for beautiful flat twists so before styling your hair, make sure it is shampooed with a nourishing shampoo like our non-stripping Hydration Shampoo. After washing your hair, follow up with our Moisture Rich Conditioner or Manuka Honey Deep Conditioning Mask to further hydrate your hair and make it soft and manageable.
2. Moisturise And Detangle
Apply a generous amount of Sofnfree's Manuka Honey Leave-in Conditioner and detangle your hair to eliminate knots or tangles and make your hair soft and manageable. To seal the moisture into your hair, follow up with a few drops of our Hair & Scalp Oil.
3. Part Your Hair And Apply Some Gel
Flat twists are extremely versatile and can be done in different ways so get creative and play around with different looks while parting your hair. Part your hair with a fine-tooth comb into your desired look and sleek down each section with some of our Twist & Braid Gel. Your flat twists can be straight back, ponytail shaped, or even styled into an updo so feel free to play around with this part.
Additionally, the size of your flat twist will be determined by the size of your parted sections. Bigger sections equal bigger twists, while smaller sections will result in smaller flat twists. However, avoid making your flat twists too big as they can easily unravel. Opt for medium or small sections to ensure they last long.

4. Twists One Section At A Time
Working one section at a time, grab a small section of hair at the front of your part and split it into two equal strands. Then, twist the right strand over the left strand and keep both strands close to the scalp as you use your index finger to gradually grab a small amount of loose hair from along the scalp into the bottom strand as you move further down the section. While twisting, use your thumb and index finger to grip the twist firmly as you add small bits of hair.
Additionally, avoid twisting too tightly. Your flat twist should be firm enough to hold its shape but not so tight that it puts too much tension on your scalp. Twist in the flat twist position until you reach your nape and run out of scalp space, then twist the ends of your hair into a regular two-strand twist to finish the length. If you have very loose curls that can unravel easily, use small hair ties to secure the ends of each twist.
5. Finish And Set Your Twists
The final step to making sure your flat twists remain sleek and smooth is to apply some of our Flaxseed Oil & Rosewater Mousse to set them in place and tame any flyaways. After applying the mousse, wrap a silk scarf around your hair for 3-5 minutes and then nourish your scalp with a few drops of our Strengthening Oil. For extra flair, you can style your edges with a little bit of our Twist & Braid Gel.
Flat twists can seem difficult to achieve at first, but once you get the hang of things and diligently follow the steps we discussed, you’ll create some beautiful looks and have fun with your hair without any hassle. Just be sure to grab our Protective Style and Braids Bundle, because each product in the set is key to achieving the flawless results.